Add and manage the students in your class
The "Students" page is the list of your class. You open it from "My students" in the menu. Each child has a card with their avatar, their name and the number of items in their portfolio.
Add a studentFree plan: 35 students per class. Pro plan beyond that.
- Open "My students".
- Tap "Add student".
- Type the "First name *". The "Last name (optional)" helps when two children share a first name.
- Tap "Add student" to confirm.
The child appears in the list right away. Repeat for each student.
Fix a student's name
A typo in a first name is fixed on the student's page, without deleting the student or adding them again. Their portfolio stays where it is.
- Open "My students", then tap the child's card.
- At the top of the page, tap the name, or the pencil beside it ("Edit name").
- The "Edit student name" window opens, with the "First name *" and the "Last name (optional)" already filled in. Correct them.
- Tap "Save".
The "Save" button stays grey until something changes, and while the first name is empty. You can clear the last name: the page then shows the first name alone. "Cancel" closes the window without changing anything.
The new name applies everywhere, right away. It shows in the student list, the portfolio, the class feed, the points, the messages with parents, and the name the child taps on the tablet.
Change a student's avatar
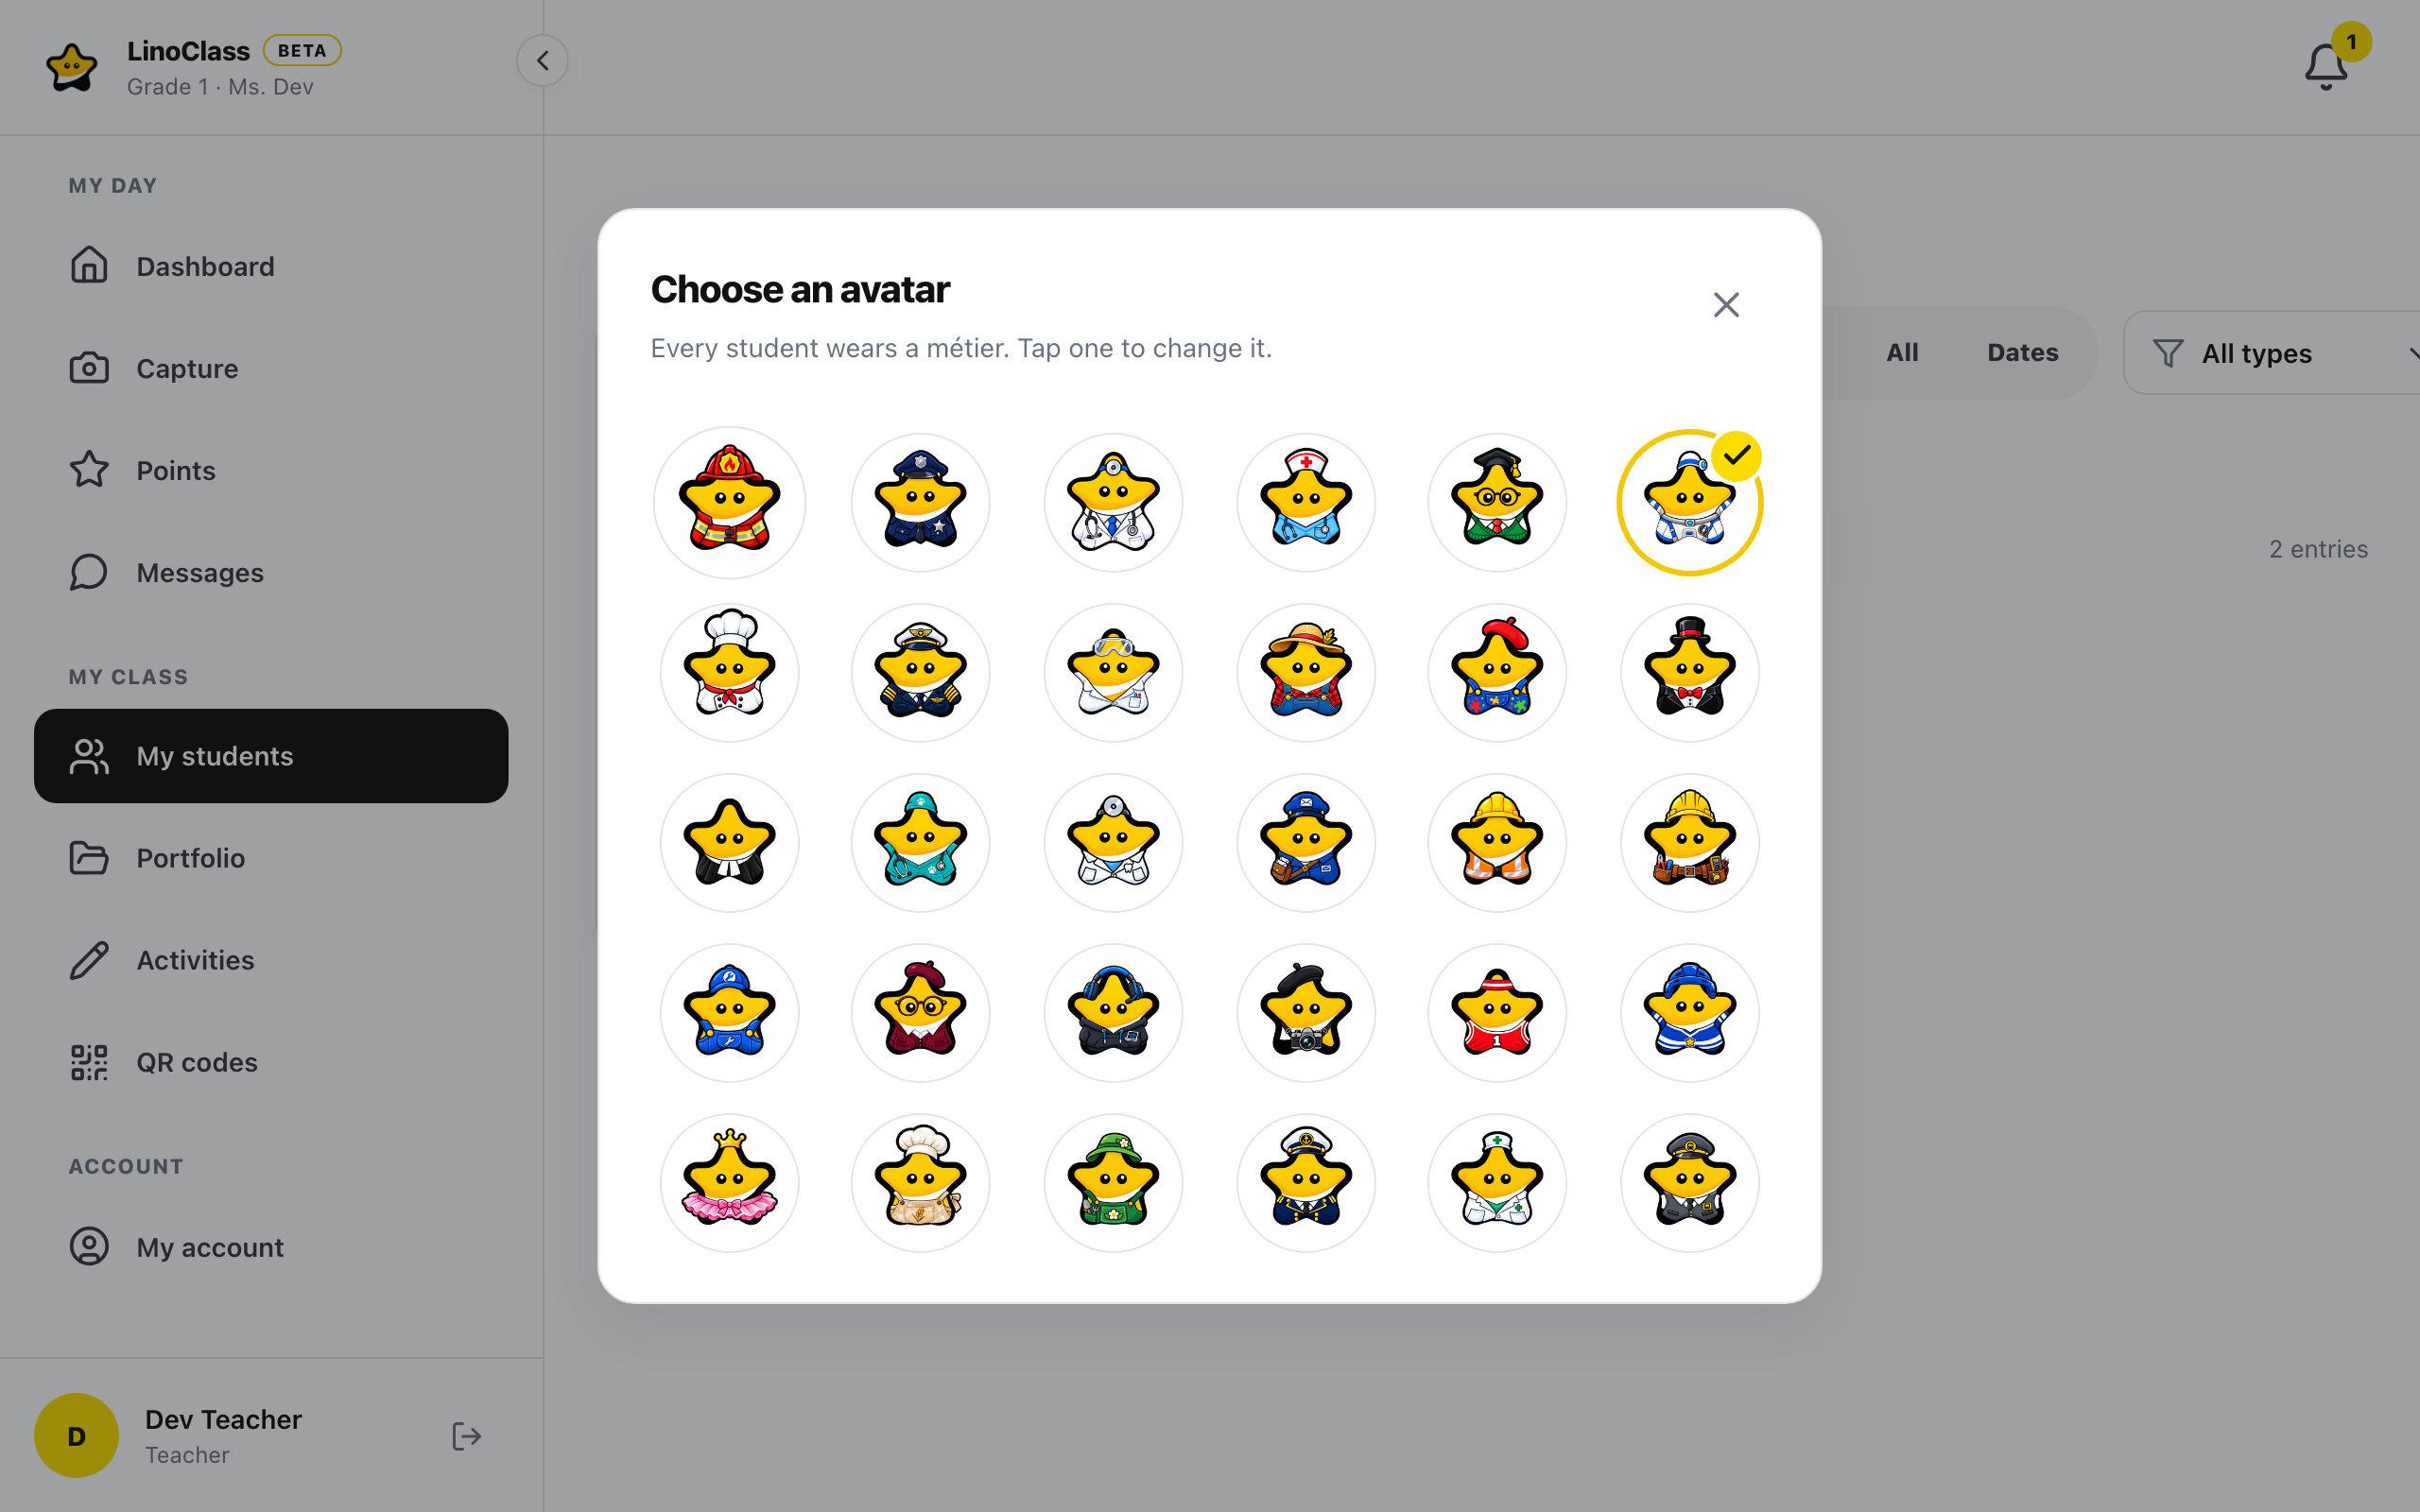
Every student wears a métier. There are 30 of them, including firefighter, doctor, astronaut and hockey player. LinoClass gives one at random to each child you add. It is the avatar the child finds on the tablet when they pick their name.
- Open the student's page.
- Tap the child's picture, or the pencil on it ("Edit avatar").
- The "Choose an avatar" window opens, with the line "Every student wears a métier. Tap one to change it." The current métier carries a check mark.
- Tap a métier.
It is saved with no further step, and the window closes on its own. On a computer, the name of the métier appears when the mouse is over the picture.
If the window stays open after your tap, the avatar was not saved. There is no message. Tap the métier again. If the grid shows letters instead of pictures, the connection dropped: close the window and open it again.
The name and the avatar can only be changed from the class owner's side. In a colleague's class, the name is plain text and the picture has no pencil.
Remove a student from the class
A student created twice, or a child who changed schools, is removed from the list.
- Open "My students".
- On the child's card, tap the trash can. On a computer it appears when the mouse is over the card.
- Read the confirmation window. It carries the child's first name and says what goes with them.
- Tap "Delete permanently".
Everything attached to that child goes too. Their photos and drawings, the comments they received, and the link with their parents are all deleted. There is no recycle bin. If you hesitate, tap "Cancel".
Form small student groupsPro plan only
A group lets you assign an activity to a few students at a time, or send an announcement to their parents only. Creating and editing a group is part of the Pro plan. Groups live under "My account", section "Groups". Until the class has one, the section reads "No groups yet."
Create a group
- Open "My account", then "Groups".
- Tap "Create a group".
- Type the "Group name". It fits in 60 characters.
- Pick a "Group colour" from the palette. The chosen colour carries a check mark.
- Tick the students. The heading of the list counts the ticked students as you go.
- Tap "Create the group".
The "Create the group" button stays grey while the name is empty or no student is ticked. The group appears in the list, with its colour and its number of students.
You can also create a group right when assigning an activity, without going through "My account". The page Assign an activity describes it.
Edit a group
A typo in the name, or a child who moves to another reading group, is fixed without deleting the group.
- Open "My account", then "Groups".
- On the group's row, tap the pencil.
- The "Edit the group" window opens, with the name, the colour and the students already in place. Change what you want.
- Tap "Save".
The row updates right away. "Save" stays grey if the name is empty or no student is ticked: a group keeps at least one student.
Editing a group does not touch what has already gone out. An activity already assigned to the group stays with the same students, and an announcement already sent to the group keeps its recipients and its old name. The new group counts from the next activity or the next announcement.
Delete a group
- On the group's row, tap the trash can.
- LinoClass asks "Delete the group {name}?", where the group's name replaces {name}, and adds: "Students stay in the class and activities already assigned do not change."
- Tap "Delete".
Deleting a group is free on every plan. If the deletion fails, the window stays open: tap "Delete" again, or "Cancel".
A collaborator also sees the "Groups" section in your class. They create, edit and delete groups like you. In your class, LinoClass looks at your plan.
When it does not go through
"Free plan limit"
The free plan takes 35 students per class. The message tells you so with the number. On the web, it offers "Upgrade to Pro" to remove the limit. You can also remove a student who has left the class to free a seat.
"Error adding student. Please try again."
The save did not complete. Check the connection, then tap "Add student" again. The child was not created, so you will not make a duplicate.
"Could not delete this student. Please try again in a moment."
The student is still there. Wait a few seconds and try again. If the message comes back, write to us at support@linoclass.ca with the child's first name.
"Could not change the name. Please try again in a moment."
The old name stays, and the window stays open with your correction. Tap "Save" again. If the message comes back, close the window and try again later.
"Student groups are part of the Pro plan."
This message replaces the "Create a group" button on the free plan, with the link "Upgrade to Pro". Groups already created stay visible, and their pencil is still there. The pencil still opens the "Edit the group" window, but it carries this same message above the buttons, and "Save" does not go through. You can still delete a group.
"The group could not be created. Please try again."
The window stays open with the name, the colour and the ticked students. Tap "Create the group" again. If a ticked student was just removed from the class, untick them first.
"The group could not be updated. Please try again."
The group did not change. Your corrections are still in the window: tap "Save" again.
The "Add student" button is missing
You are in a colleague's class, as a collaborator. The student list belongs to the class owner: only they add, rename or remove a child. You can capture, post and award points. See Share the class with a colleague.
Frequently asked questions
Can a student be in two classes?
No. Each student belongs to one class.
Does removing a student notify their parents?
No. The link with their parents is removed along with the student, and no email goes out. Let them know yourself if that is useful.
Where is the number of students in the class?
At the top of the list, under the search bar, and under "My account", section "Class", as "Number of students".
Does the corrected name show up for the parents?
Yes, with nothing more to do. Parents see the new name the next time they open the app, on the portfolio and in the messages.
Can two students have the same avatar?
Yes. Nothing stops two children from wearing the same métier. If you want to tell them apart, pick another one from the page of one of the two.
You edited a group. Does the activity already assigned change?
No. An activity assigned to a group stays with the students who were in the group that day. To give it to the new student, assign it again.